Pine Needles at Gardner Village
1100 W 7800 S #3
West Jordan UT 84088
801-233-0551

contactus@pineneedlesonline.com

Tuesday, January 29, 2013

A Bit More Progess!!!

Moving day is approaching so quickly!!  We are reupholstering chairs, painting tables, repurposing doors, wallpapering, and so much more; ALL in anticipation of moving day  :-)   The new flooring comes on Thursday, new lighting fixtures come on Wednesday; so the progress will continue!

Here are a few photos showing a bit more progress with the actual building....


new main entryway

main floor

porch outside the 2nd entrance

(watch for a fun "pop" on the walls behind the barn doors)

kids room

Monday, January 21, 2013

FAMILY & FRIENDS SALE

Friday & Saturday,
January 25th & 26th
10am to 8pm
  • 30% off all regular priced merchandise*
  • fat quarters $2
  • select quilt magazines $3
  • 30% off quilt kits
  • clearance fabric additional $1 off per yard
  • clearance fat quarters $1
 
* discount does not apply to prior purchases; only applies to in-stock merchandise; 1/2 yard cut minimum; may not be combined with any other offer; see store for details, some exclusions apply


Saturday, January 19, 2013

Stash Builders!

Last week we opened a few boxes that were delivered by none other than our UPS man, Greg.  The boxes contained some FANTASTIC stash builders! 


We took advantage of some awesome sales that our distributors are offering and we are passing them on to you! 

Just look at some of the AMAZING bolts we have added to our clearance section!!!

Hurry in before Wendy returns from her vacation, because when she has a chance to look at these bolts there may not be any left for the rest of us! ;-) Love ya Wendy!

BE SURE TO CHECK OUR BLOG MONDAY FOR AN EXCITING EVENT TO BE ANNOUNCED!

Friday, January 18, 2013

More Progress!

The classroom all framed in :-)

A new opening cut into a wall


Here are a few more pictures showing you some progress on our new location!  I go in every day just to see what is new and different, I am never disappointed.

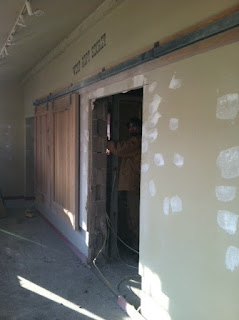
Another view of the new cut out
The new front entrance is looking good!
Today the 'Steve the painter' began his work (do you hear the theme song for Bob the Builder anyone?); and oh my goodness does he have a lot of work!


new paint in the kids area


Keeping track of the remodel is not the only thing that has been keeping us busy around here.  We have been busy cutting fat quarters of new fabric lines, receiving some of the best books I have seen for a while, along with planning new quilts to make for the store.


Here is a peak at just a few of them....


for Lakehouse

Summer House by Anka's Treasures

for Moda


Hope to see you soon!!


Wednesday, January 16, 2013

It's Time for a Tutorial!

I am so ready for some sunshine, how about you?  I love this time of year when we are deep into winter and I get to bring a little sunshine in my house with my Valentine decorations.  I have wanted to make a headband using our fun metal blanks and thought this was the perfect time for it.  Wouldn't your little cutie-pie look adorable wearing this!

Sweet Valentine Headband


 So let's get started....... gather your supplies. You will need
  •  one headband blank (available at the store)
  •  1 or two scraps of green wool and/or wool felt
  • 3 buttons
  • 3 scraps of fabric for the flowers (approximately 4" each)
  • 1 - 2-1/2" x 13" fabric to cover headband
  • glue gun
  • basic sewing supplies
  • 1/2 yard ribbon
Now let's put it together. (I hope you don't mind, but I like pictures and so this tutorial is full of them, bear with me)


  • From two of your flower fabrics cut a 2-1/2" circle, from the remaining fabric cut one 3-1/2" circle.
  • Mark the center of each circle with a pencil. 
  • To create flowers fold one edge of circle up to meet your marked center.

  • Rotate and fold up the edge of the circle so that point A (see illustration) meets up with marked center. Continue rotating and folding, each time having the outer right fold point meet up with the center mark. 
  • Tack at center point to keep folds from opening up.
  • Sew a button in the center. Note: The folds are the "right" side of the flower.  Repeat for all circles.
  • Cut out two leaves from wool or wool/felt approximately 2" long and 1-1/4" at the widest part.
  • Tie a double bow with ribbon. 


  • Fold headband cover fabric lengthwise right sides together. Sew a scant 1/4" seam along the long edge. 
  • Sew a 1/4" seam along one end, with the seam down the center. Turn right side out.
  • Slip over the metal headband with the seam on the inside.
  • tuck raw edge in at the end. Hand stitch or hot glue -opening closed.


  • Glue leaves in place beginning approximately 3-1/2" from end. 
  • Glue largest flower in place.
  • Glue two additional smaller flowers next overlapping.
  • Finish by gluing double bow under the edge of the small flowers.
I hope you enjoy!

SANDY


Monday, January 7, 2013

It Has Begun.....

We have known for at least four months that we would be moving into a larger space here in Gardner Village, but it is hard to believe that the time passed so quickly and now the move is only a few weeks away!!!  FINALLY we can see the progress and changes being made to the building in preparation for our MOVE!!  Here is a look at the progress....


main floor

preparing an exterior wall for a new main entrance

a look up into the classroom on our 2nd floor

new main entrance


Each week I will post more pictures of the progress :-) along with revealing a few surprises we have coming up before moving daySO STAY TUNED!!